Showing posts with label leatherwork. Show all posts

Tuesday, July 24, 2012

Making a Sporran in Leather

I can't tell you how many times, I've watched this video. Not in order to make a sporran, but to pick up on some of the techniques, that he uses. Every time I watch it I pick up something new. First of all I know, that I've got to buy a head knife at some point and learn firstly how to sharpen it and then how to use it correctly without cutting off any limbs.

I hope, that you can get something out of this video, even if you don't work with leather.


Luckily someone uploaded the video to Vimeo, which makes sharing a lot easier. The original can be found here.
READ MORE - Making a Sporran in Leather

Sunday, May 20, 2012

Restoration and Modification of An Old Stitching Clam

Some time ago I managed to rescue an old sewing clam, which was being used as display in an suburban clothing store. A sewing clam, you ask, is something you use, when you sew leather by hand. The clam sits between your legs and holds the object for you, so you can use both hands freely for sewing. 
The condition of the clam was rather good, but it still needed a bit of restoration. However the length wasn't ideal for the way I sew leather, as I rarely use an awl for making holes, when I sew. Therefore I needed to modify it slightly by making it shorter, so it would sit in front of me. Therefore I brought it with me to my parent's place, as my dad has more tools and much more experience with woodwork, than I have.

This is how the sewing clam looked before it. It was quite hard for me to alter this old piece of genuine craftsmanship, but I wouldn't be using as much, as I will now. So I felt like, I had to do it in order to bring it back to use and back to life.


First we sanded it down. 


The length was shortened. Nerve wrecking procedure.


Then we drilled some holes in order to add a screw, that would secure the jaws without causing leg fatigue.


I gave it some shellac in order make it a bit harder - although the wood was extremely hard and dry.


After the shellac had dried I glued on some leather at the tip of the jaws. This was added so the object, that you're holding, doesn't get scratched.


Lastly a hinge were attached, so it can still be used the way it was intended.


The final result.


READ MORE - Restoration and Modification of An Old Stitching Clam

Monday, March 12, 2012

Crafts - Rune's iPad Sleeve

Last summer one of my best friend's, Rune, came by to give leatherworking a go. He spent hours burnishing the edges on the belt, that he made and it was a joy seeing someone so consumed of this one thing. It was just him and the leather - everything else seized to exist for some time. Just before leaving he told me about an idea of making a sleeve for his iPad and so we did, when he came to visit from Copenhagen this weekend.

Rune made the sleeve himself - almost at least. I tried to help, but it was mostly in terms of design. The details he picked himself and of course he decided to use the most extravagant solutions. He picked the football leather from Horween and the fattest, thickest and most greasy thread, that I have in my arsenal; a thread called Nyltex. Nyltex is not a braided or twisted thread  - it just consists of of multiple strains, which makes it hard to get an even stitch, as the thread becomes either twisted or totally flat. Normally a thread, that I would use on very thick leathers and honestly I usually avoid it because it's so hard to get nice, even stitches, which is what I always strive towards.


The design is a fairly simple envelope design, but it's very functional and we added a couple of nice details.


I'm amazed by the surface of this leather. Especially this irregular pattern, that runs across the sleeve. It looks a bit like small flowers. Very beautiful.


The stitches turned out quite well considering the fact, that Rune has very limited experience with stitches, but he took it slow and was very thorough. 


Edges were finished in black using Edge kote by Fiebings. A product that I very rarely use, but it turned out quite good. It's impossible burnishing the edges of this leather.


A button stud makes for the closing mechanism. Very simple. Plus I got to use my antique leather buttonholer, which is always a joy.


The stud button doesn't come in contact with the iPad itself, so there is no danger of scratching the darn thing. And again, that texture is just something else.


I'm very interested in seeing, how this sleeve ages. The key wallet, that I made for my brother in law some time ago, has aged quite nicely, so my feelings towards this leather is becoming more and more positive, although it isn't the easiest to handstitch. 
READ MORE - Crafts - Rune's iPad Sleeve

Thursday, February 9, 2012

Crafts - Mil-Spec Lanyard

Here's a small piece of custom leatherwork, that I did for my good friend, Rasmus. He requested a new key hanger or lanyard, as his old (shitty) one finally gave up.

I know, that Rasmus is quite into jeans, so I made him a lanyard with some very nice details, that would go well with a pair of jeans. I'm actually quite satisfied with it. So much I'm making one for myself now.


These pictures were taken after a couple of weeks of use and it looks like it is evolving quite nicely. The leather I used is a 3mm thick vegetable tanned leather from Germany. I oiled it quite a few times with Neatsfoot oil, just to get the process going.
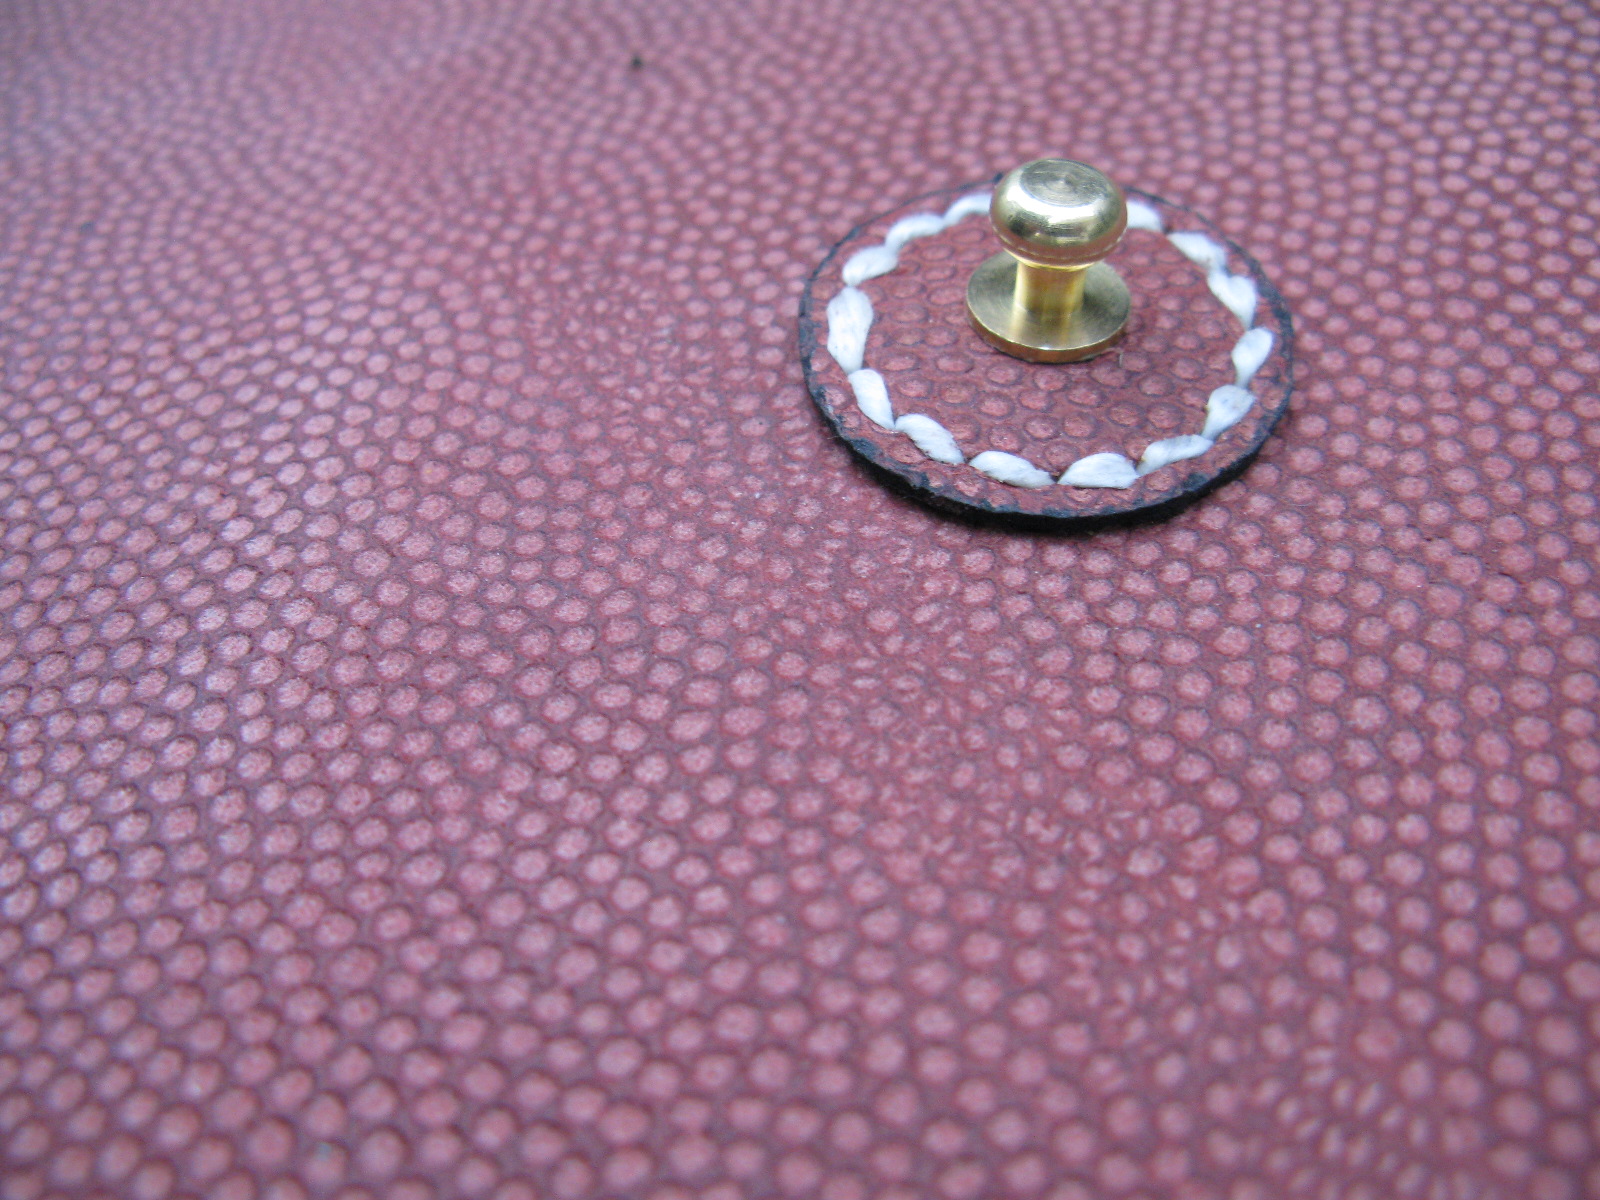
The hardware is a bit more interesting. It's from the Danish military and it is made of steel/nickel, that has been enameled. The buckle is deadstock, so there is no chipping whatsoever, but the snap has been used - heavily - so it has plenty patina. I'm hoping, that they resemble each other a bit more with wear. 


I secured the snap using a 6 ply waxed Irish linen thread. Sewn by hand, of course. And here you can see my custom maker's stamp. I've come to the conclusion, that it's too hard getting it perfectly centred, so now I'm just quickly punching it. So it always gets a bit crooked, but that's just charming, I think.


All edges have been rounded slightly and burnished using beeswax and good, old elbow grease. What you can't seen from these pictures, is that the buckle has been set using two solid copper rivets. This is a very rugged solution, and it adds to the character, once the ageing process really kicks in. Nothing goes as well with vegetable tanner leather as solid copper rivets. 

All photos by Rasmus Jakobsen and all words (and work) by Simon Tuntelder
READ MORE - Crafts - Mil-Spec Lanyard